

Are you searching for an easy way to turn your Sketch files into React code? Well, now you can - with Anima's newest feature!
For those of you who've never heard of Anima- it is a plug in for Sketch. It helps you create responsive layouts and high fidelity prototypes. Anima's newest feature allows you to collaborate with developers even better because it automagically ,as they say, exports your Sketch designs and turns them into reusable React components.
In this post, I'm going to walk you through all the options of this new feature.
Accessing the Export to code options
Unfortunately, I have to give full disclosure here- this feature is only available for the Pro users, so if you are using the Free version, you probably won't see it. However, you can always sign up for the 30-day-trial for Pro and test it for yourself.
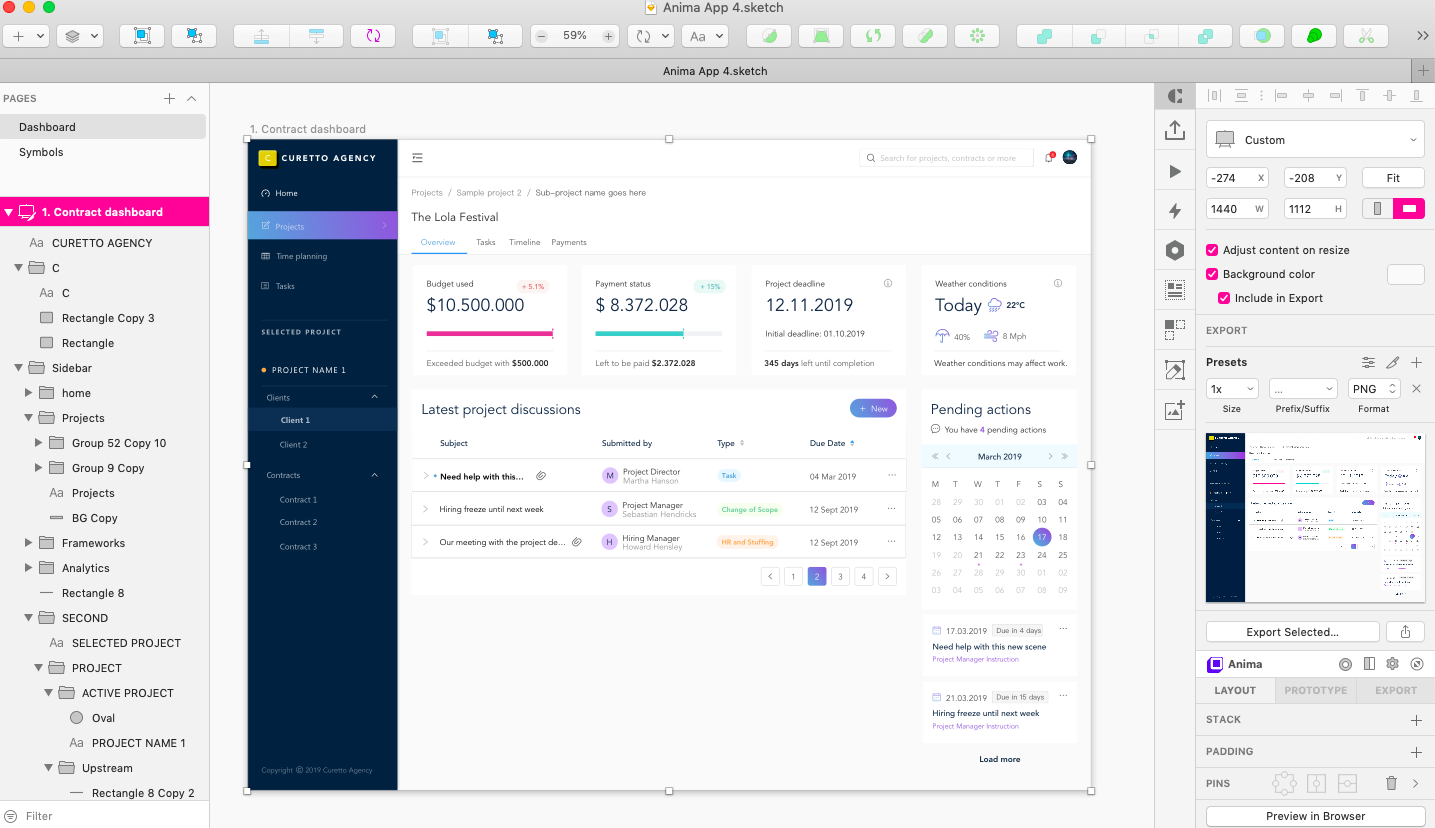
You can access the new feature by selecting your designs and clicking on Preview in Browser. That will generate a new project inside Anima which you will be able to view after logging into your account. After that you need to make sure to sync your new project to the app.
Automatically generated DIVs
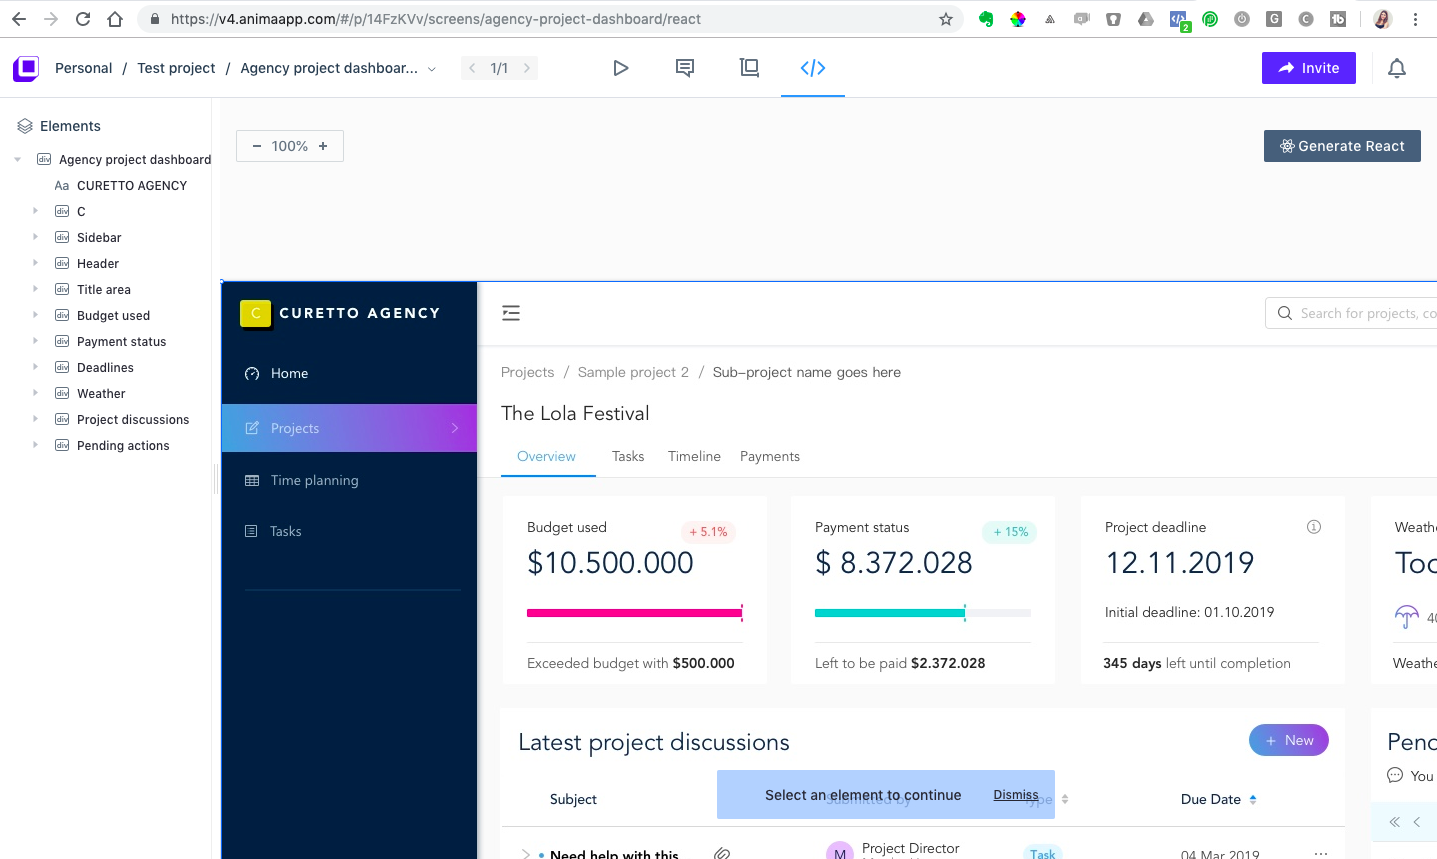
Once your files is synced, a new window will open and you will be able to see the divs on the left-hand side, the selected screen, as well as the Generate React button on the right.
What I really like about this feature is that Anima has already created different DIVs without me having to do anything. Attention though: those DIVs are based on the folder structure of your Sketch file! So, if you tend to not organize your files this is bad news for you 😆 In order to get started simply click on a Div and click on Generate React button.
You might also like this post: My Step-by-Step Guide to Doing a Redesign for a Charity Website
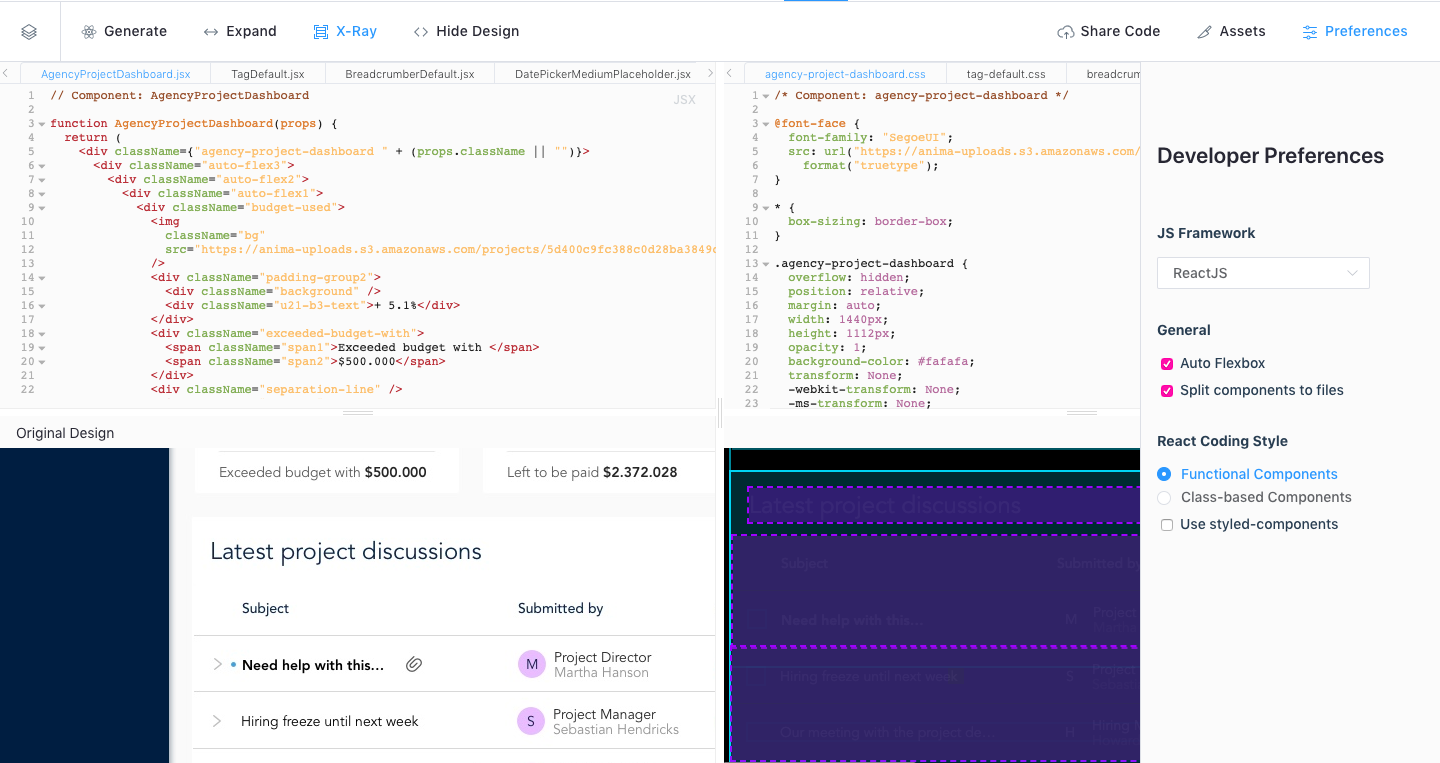
React code-options for developers
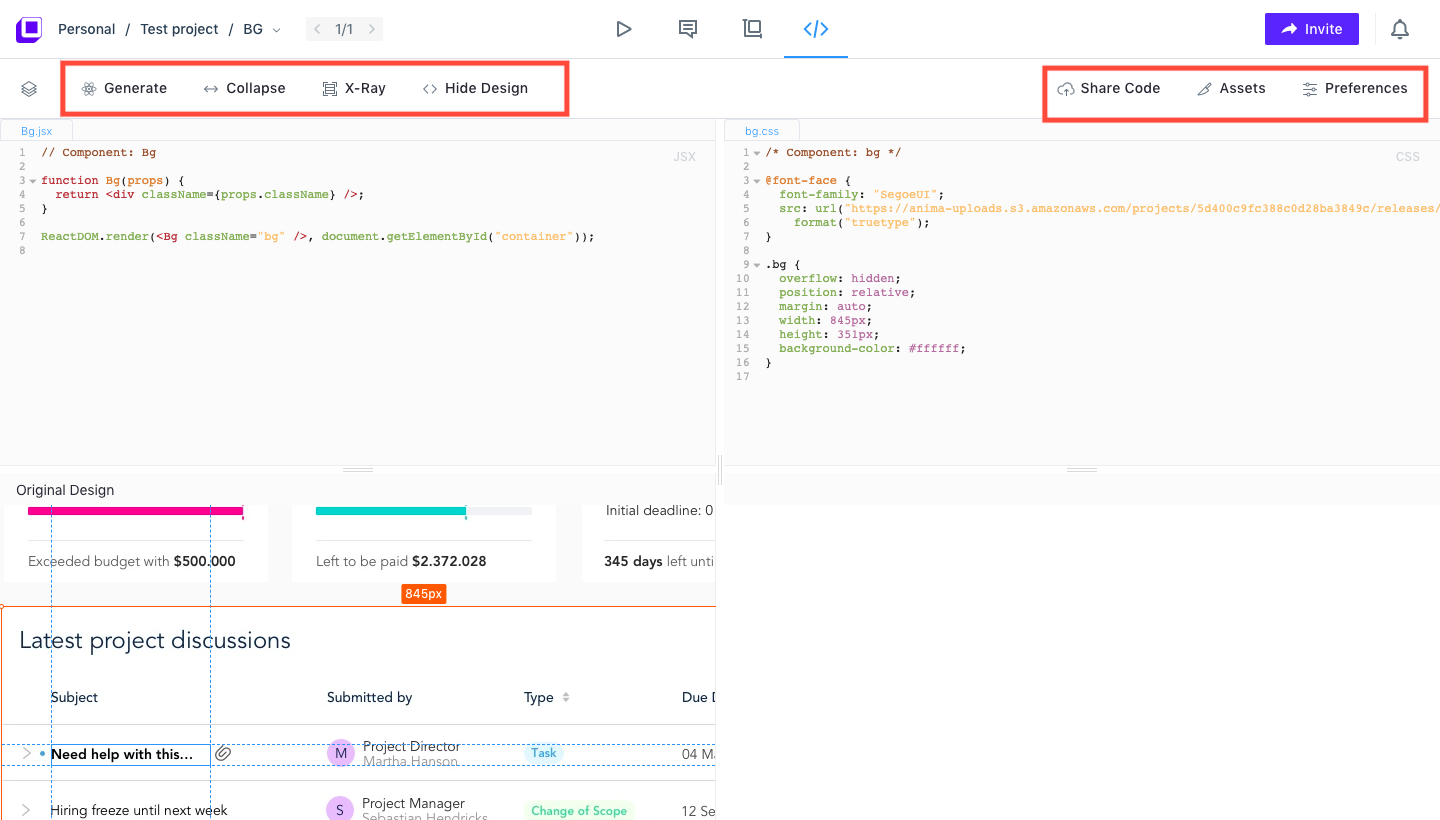
Once you click on Genrate React. You will be able to see a screen similar to the one below. You will get the CSS code, the JavaScript code, you will see your design and depending on what you will select in the upper-left menu, more options can appear.
Let's first turn our attention to the upper-right menu though: You have the following options: Share Code, Assets and Preferences.
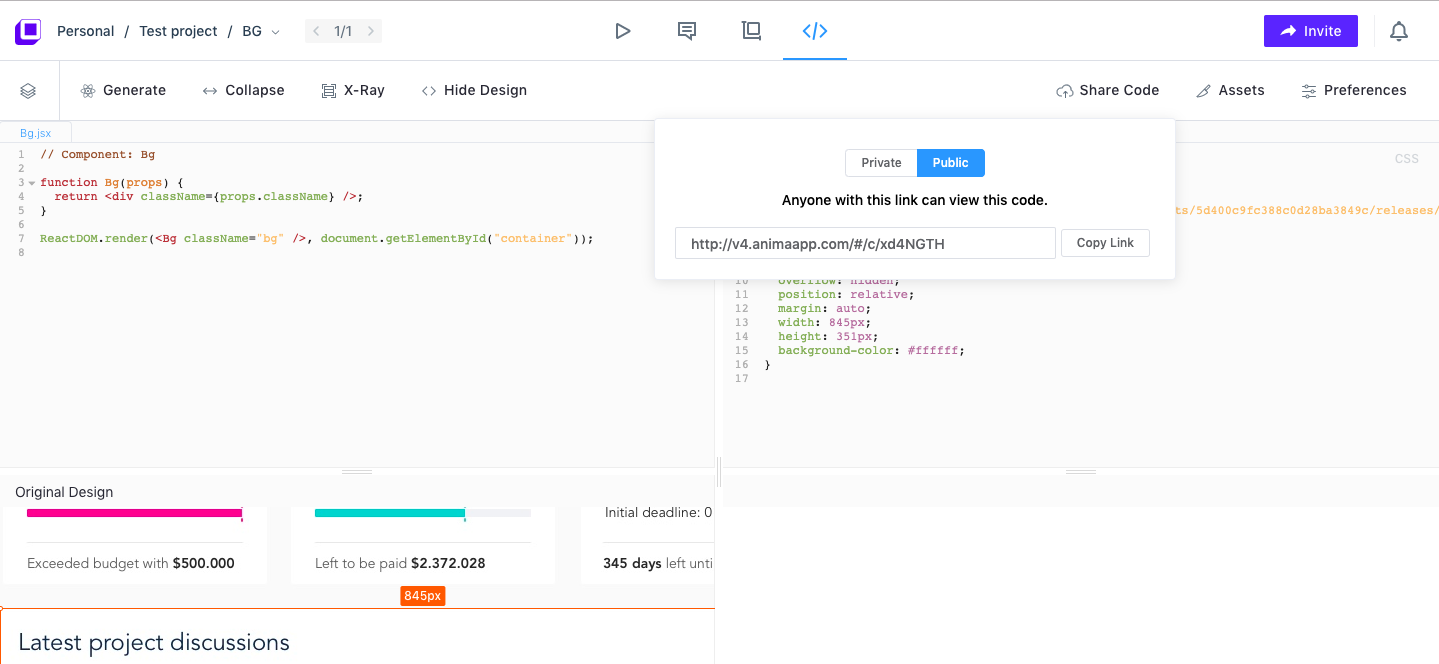
Share Code
Sharing the code simply allows you to share the entire project with a fellow coder, or with anyone who would want to see an automatically generated code. It's pretty simple.
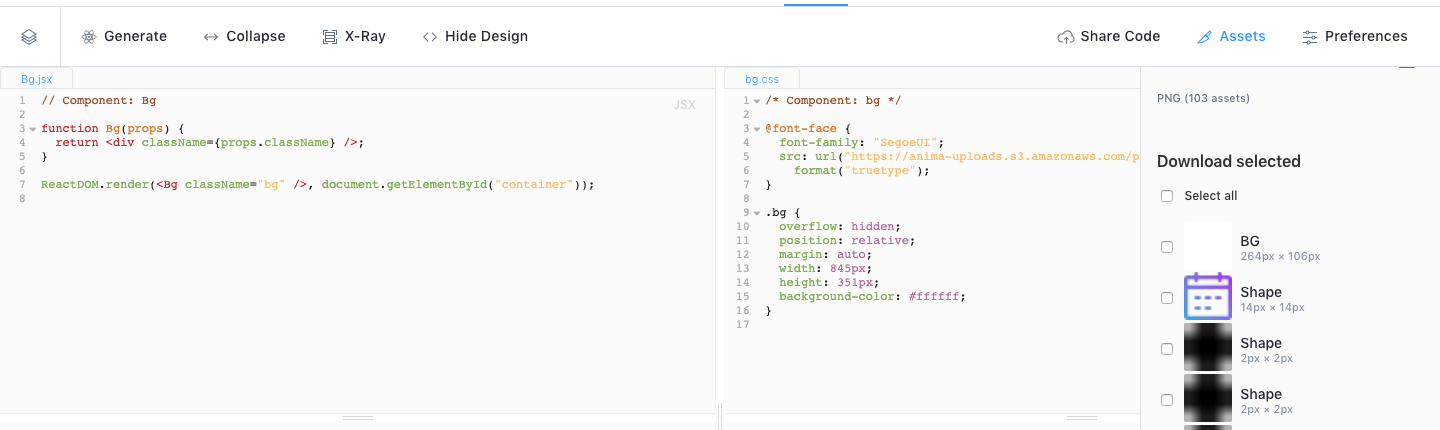
Assets
With a click of a button, you can select all assets which are automatically extracted from your Sketch file, or you can selectively download just the ones that are needed.
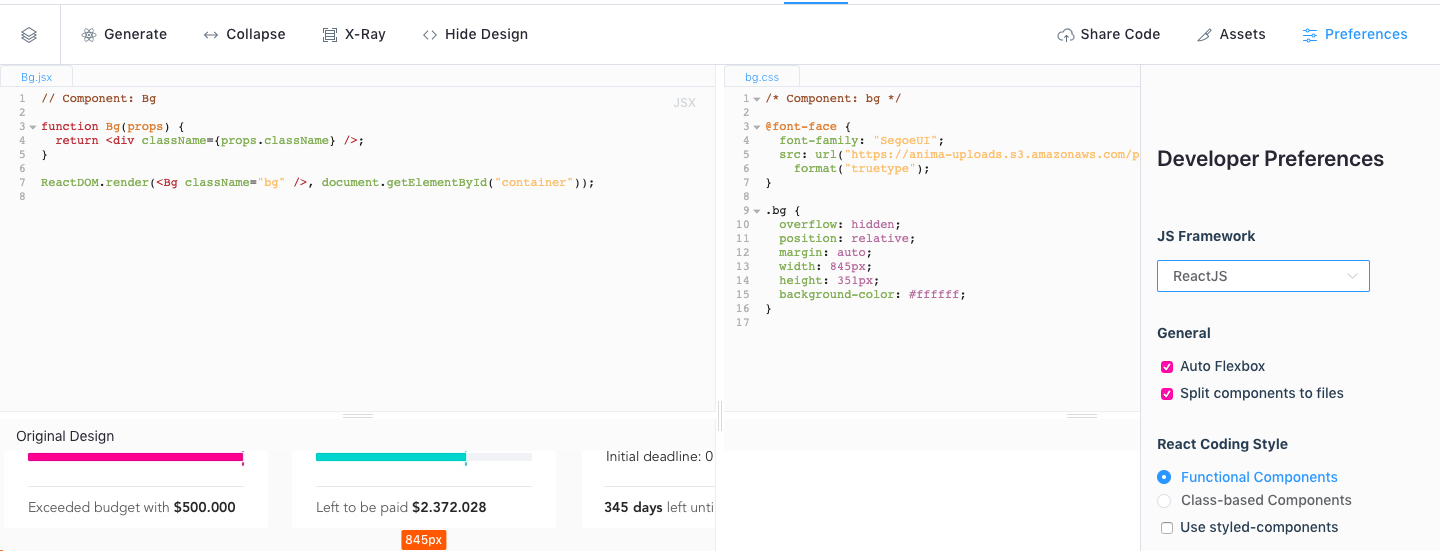
Developer Preferences
You can experiment with different options. For example, you can select the Javascript network: you can choose between React or VueJS. You can tweak the settings- using Auto Flexbox and whether or not to split the components into files. Last but not least, you have a bunch of options which you can tweak in order to adjust the exported code to your own coding style.
Unfortunately, every time you change one of the settings, you'd need to re-generate the code by clicking on the first tab on the left called Generate React. A bit clumsy, but it works.
Auto Flex-box
I guess this is one of the big advantages of this new feature- you can choose whether or not your code should automatically-generate the css code for Flexbox. This should come in handy when designing for responsive web!
Download entire code as a .zip file
One last thing. If we go back to Sketch then navigate to Anima> Export> Code and click on it, this will actually create the code for you, and you can export it as a zip file. So, if you don't want to go through the process of sharing this project with your developers, sharing the link, you can just export it as a .zip file and then share it that way.
For more Anima tutorials, check out Iglika TV:
Interactive prototype with Anima and Sketch -Part 1: https://youtu.be/Q1KCvTPicaQ Interactive prototype with Anima and Sketch -Part 2: https://youtu.be/NVI-ZWyzGC4 Interactive prototype with Anima and Sketch – Part 3: https://youtu.be/pUoEWGdQrtg Creating Dynamic Buttons using the Padding Option: https://youtu.be/8yQXpIyNdBQ
If you prefer to watch this blog post as a video tutorial then just click below 👇🏻


