

As an online business owner, you have to continually ask yourself how to showcase your products or services to more people, so you can eventually drive more sales. This means that you have to use every chance you get to convert people into potential customers.
So, how do you do that? Use the power of social media ;)
In this blog post, I will guide you through my super simple 5-step process of designing a Facebook cover for your business page that will also drive more traffic to your business.
What's the main CTA of your new cover?
Before you design your cover image you need to define the main call-to-action (CTA) of your new cover.
Think about what you want people to do once they land on your Facebook page. What’s the main Call-to-Action they should be taking?
Here are some examples:
- Sign up for an online course
- Read the latest blog post
- Subscribe to your email list
- Visit your online shop
Tip: Make sure that your call-to-action supports the built-in button on your Facebook page. 😃
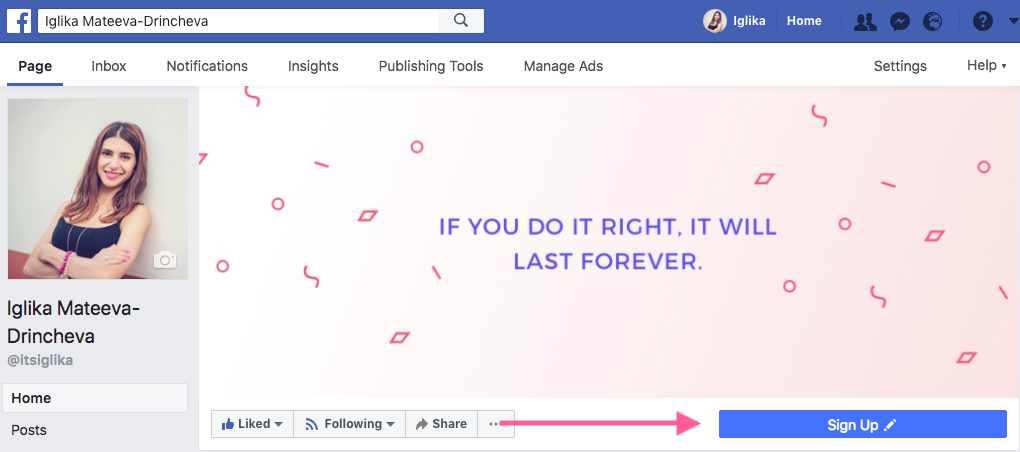
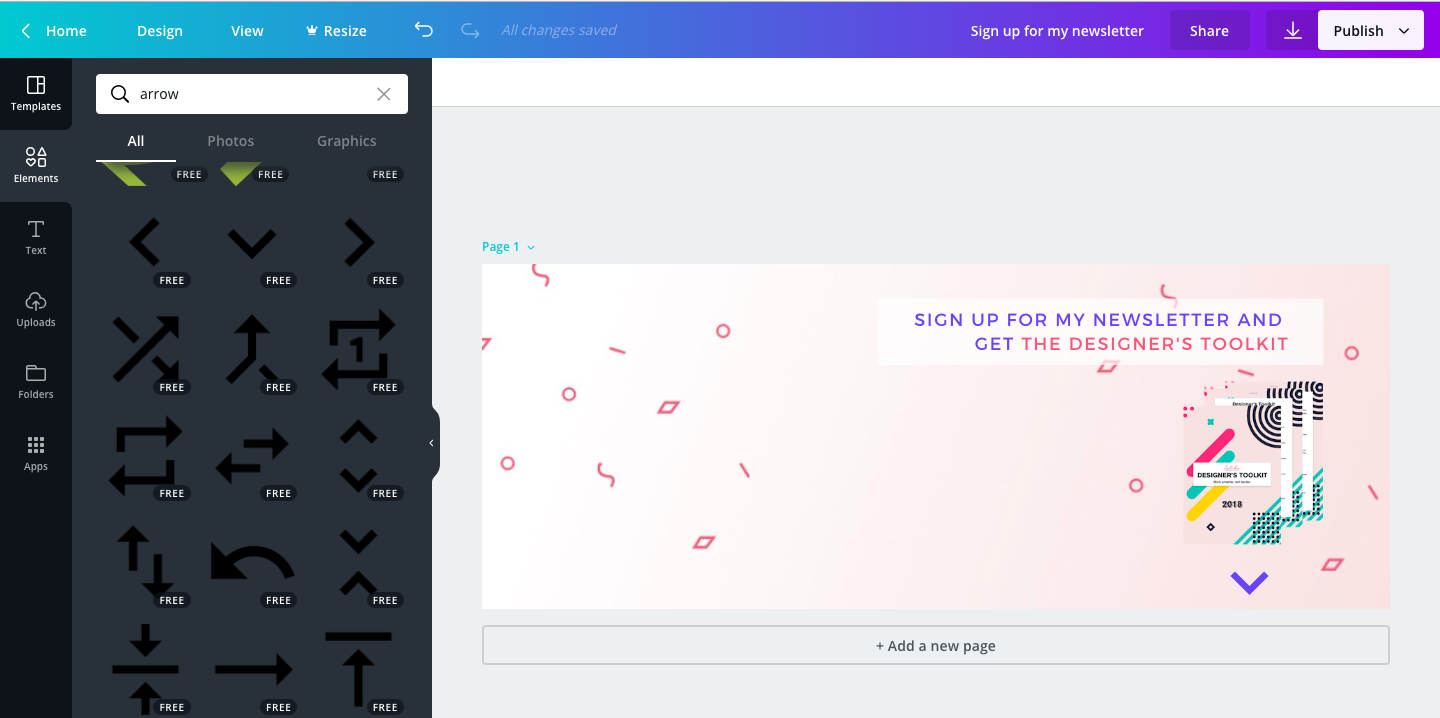
Let's take my Facebook page as an example. Currently, I have just a quote and nothing else. I would like to, however, promote my free design toolkit and let people subscribe to my email list.
So, I have chosen the CTA button Sign Up (you can adjust this in your settings). This is going to be my main call to action.
Step 1 Log into Canva & create a new file
Once you have figured out what your main CTA will be, it time to start designing! My favorite design tool for non-designers is called Canva and we will be using it for the purposes of this tutorial.
If you don't have a Canva account, register before continuing with this tutorial. It's free.
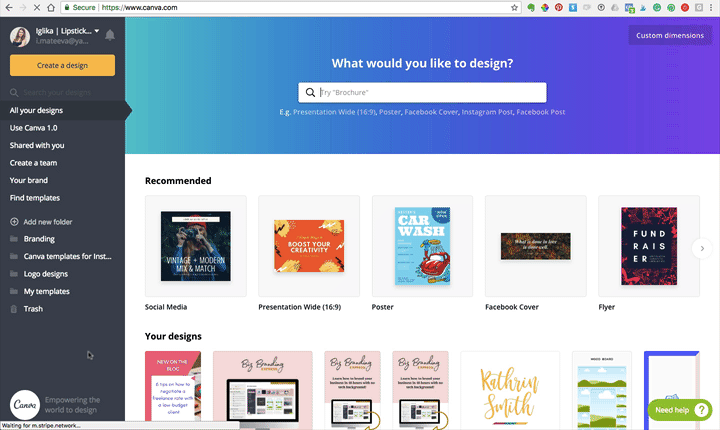
Log into your Canva account, click inside the search bar in the right part of the screen, and from the drop-down menu choose Facebook cover. This will open a new pop up window.
Canva will create a new blank canvas in the correct size for you (820 x 312 px).
It's important to choose the correct image size because otherwise, your image will appear blurry since Facebook will stretch it in order to fit into the right dimensions.
Step 2 Design your cover
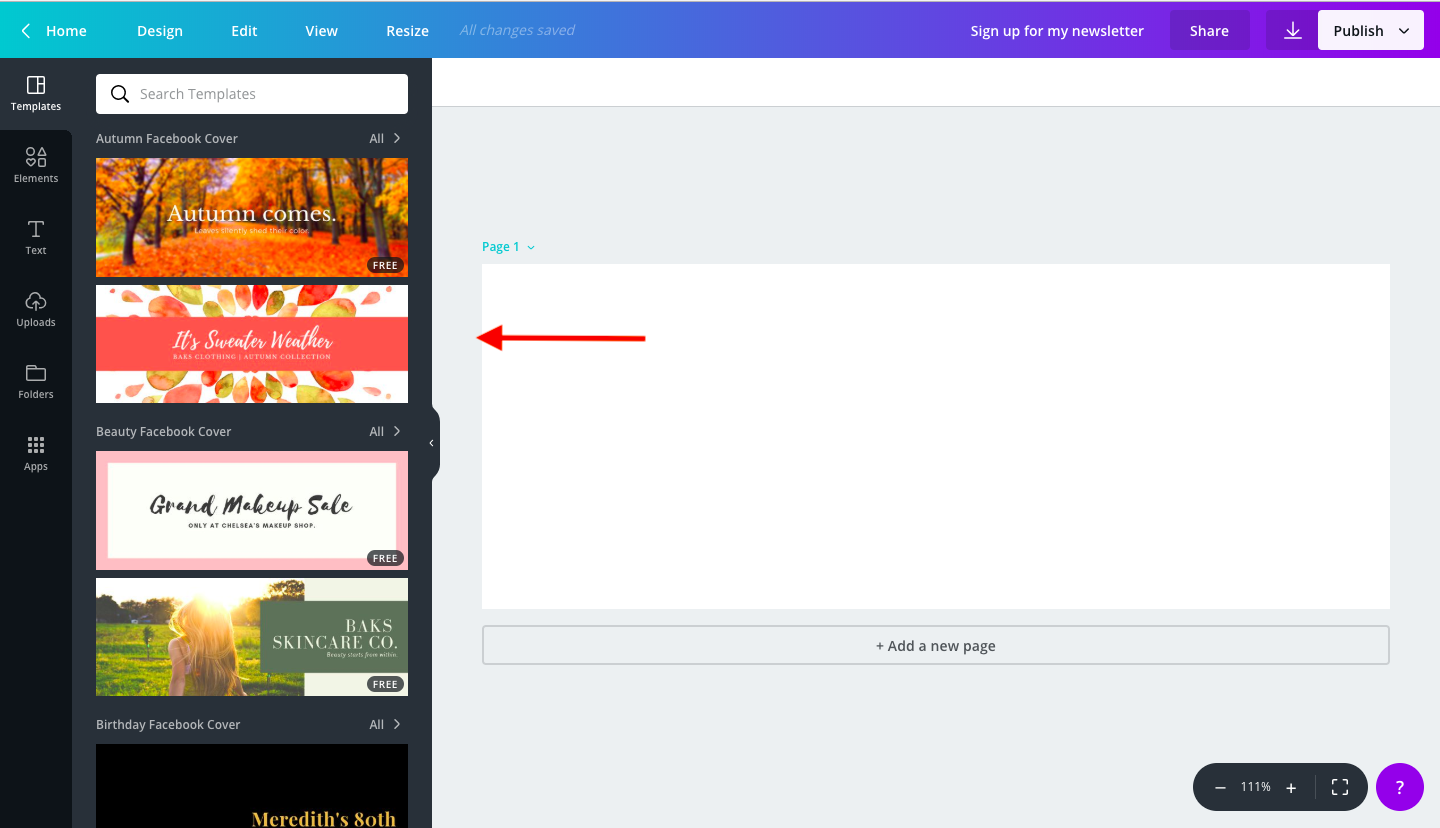
You can decide whether or not you would like to use a ready template. Canva does have a huge variety of pre-made templates and a lot of them are FREE. You can find them on the left-hand side of your screen. Once you click on one of the options, Canva will copy it to your current blank canvas.
If you have no design skills, but you need to create something that looks professional, then I advise you to choose one of the templates.
However, if you feel you are quite good at designing, you may want to create a brand template and stick to your brand guidelines.
Tip: When designing a cover photo, you should keep in mind that a lot of people would access your page on their mobile phones. Therefore, it’s important to design it in a mobile-friendly way. Pay attention to how that image scales to the size of the device. For instance, on mobile devices, people would see an additional 75px on the top and bottom of your image. Here'a handy sizing guide.
In addition, always remember to use your brand colors when designing your cover image. You can easily copy and paste your HEX color values inside Canva.
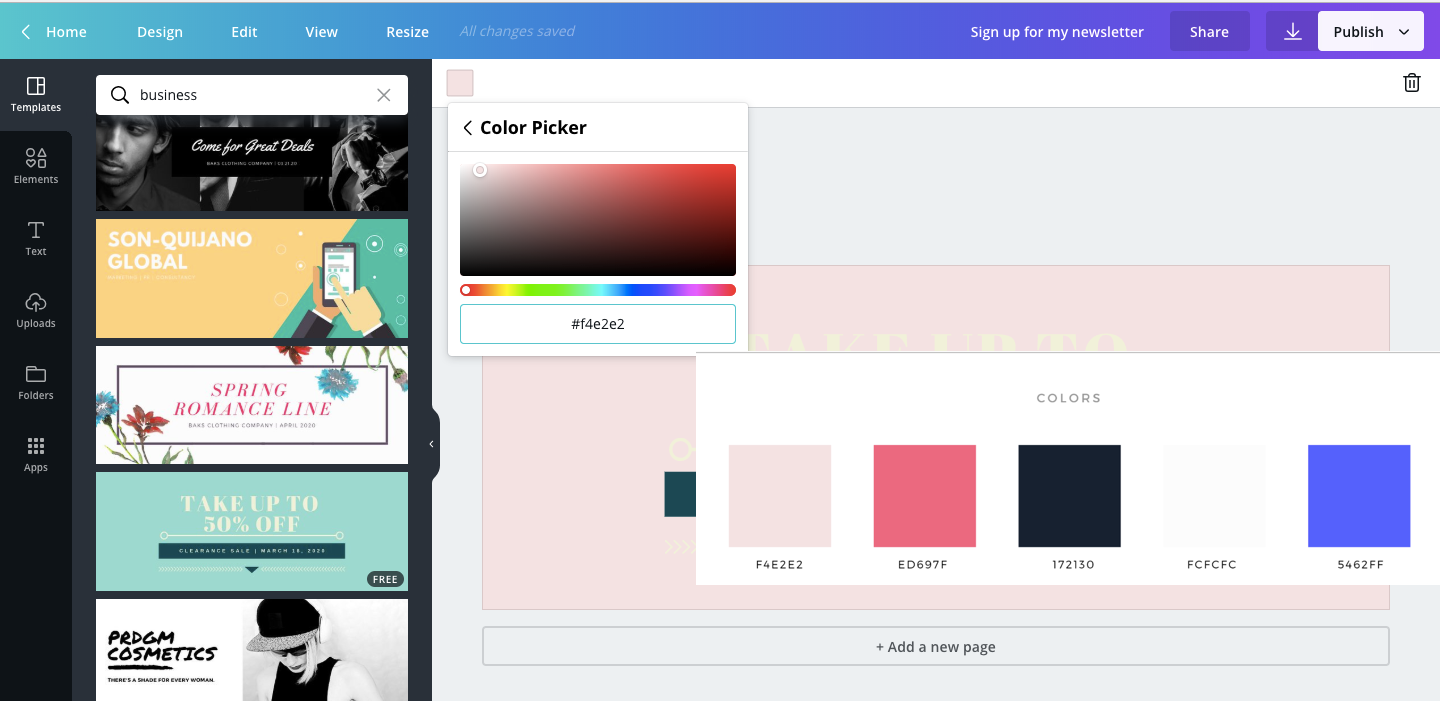
I decided to use my own background image, which I uploaded to Canva by clicking on Uploads. You can add various elements, change, crop and adjust the templates to make them your own.
You may also be interested in this blog post: Best newsletters for UX/UI designers
Step 3 Add a call-to-action image to your cover
Once you are happy with the final design, it's time to add the most important element- your CTA image.
The CTA image should be positioned either in the middle of your image or towards the right side, right above the built-in button on your Facebook page.
Depending on your action, you may want to use things like a book mockup, a guide mockup, or a free gift. It's important to visualize what the user will get after they click on that button. Remember, we want them to click.
Tip: include copy that supports your desired action. Example: click for a free trial, get the free e-book, subscribe to our YouTube channel etc.
For my Facebook page, I have created a mockup of the Designer's Toolkit, as I want aspiring designers to subscribe to my newsletter and in return, I will send them this toolkit. Also, I made it clear that I want them to click on Sign Up to subscribe and get the guide. I advise you to use an arrow pointing in the direction of the button.
Following my example, create something that works for your business. Get creative :)
Step 4 Export your file
Once you are done designing your file, make sure it’s saved!
Now all you need to do is to download it and upload it to your Facebook page.
In order to download your banner in Canva, all you need to do is to click on the Arrow next to the Publish button and choose the file type.
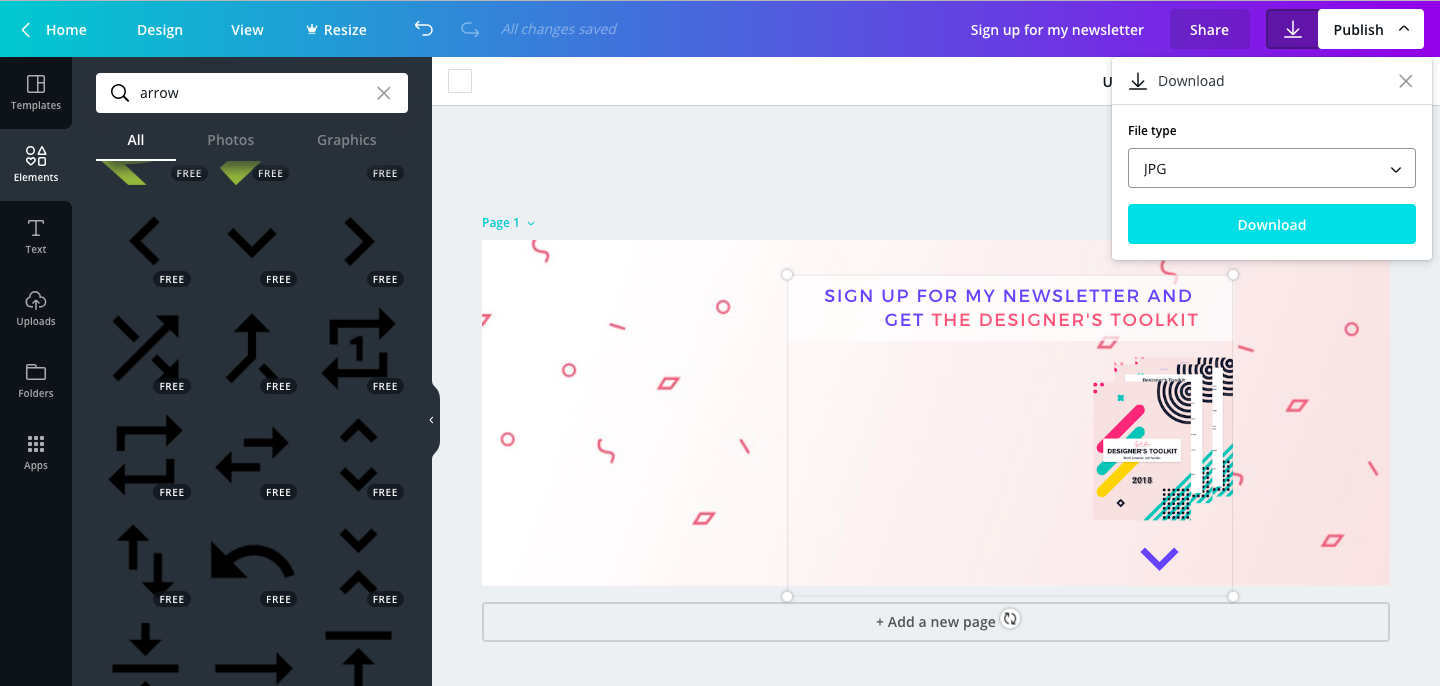
For best results, save your file as a JPG.
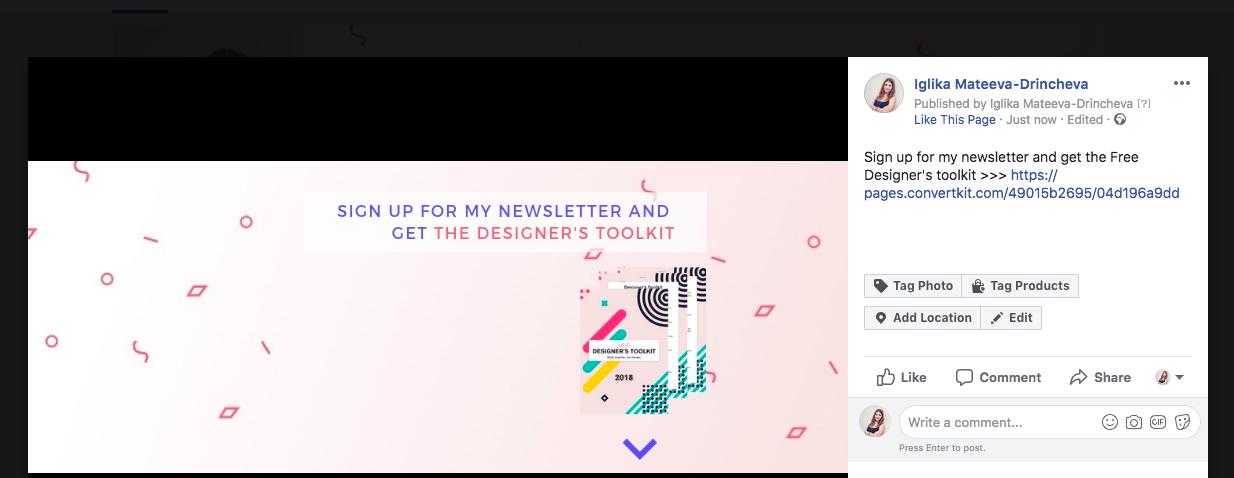
Step 5 Insert text CTAs in the cover image description
In order to make the best out of your new banner, you need to insert a CTA link inside the cover image description. Once people click on your cover image, they will have another chance of taking that action that you advertise on your cover.
After you've uploaded your new cover, just click on it and insert the desired captions.
So, start designing your new Facebook cover image now! Feel free to share your results in the comments below 👇🏻


